
To effectively track and gather data on the current Fill Level and Temperature of an asset, a G2 Fill Level Sensor must be installed, allocated and activated for that asset. This article shows how to allocate a G2 Fill Level Sensor to an asset.
To ensure a smooth installation process, we highly recommend turning on the G2 Fill Level Sensor and allocating it to the asset just before installation. Make sure to verify that the correct Identification Number of the G2 Fill Level Sensor has been assigned to the asset. The Identification Number of the G2 Fill Level Sensor can be found on the side of the sensor, right next to the QR Code.

Learn how to Turn ON the G2 Fill Level Sensor.
- Open the Superfy App on your phone.
Use the login that was initially set up for you to access the Superfy App.
Don’t have a login?
Please reach out to your Company Admin, Account Manager, Customer Success Manager, or email support@superfy.com. They will be able to assist you in creating a login for your account.
- The GPS on your phone will detect your current location, which will then be displayed on the map as a Blue Dot.
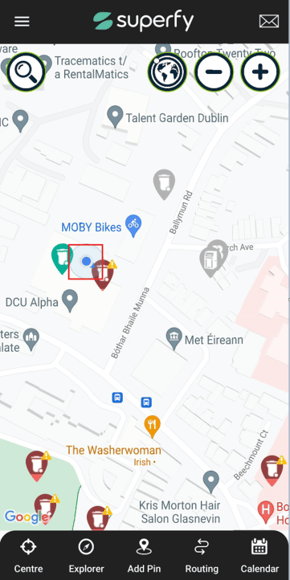
If you are not currently at the location where the asset is located, you can use the Magnifying Glass on the left-hand side of the Map View to search for the Address, Asset Name, or Sensor Serial Number of the asset to which you want to allocate a sensor.

- Click on the Asset on the Map and select View.

- On the Asset Information screen, scroll down to Sensor.
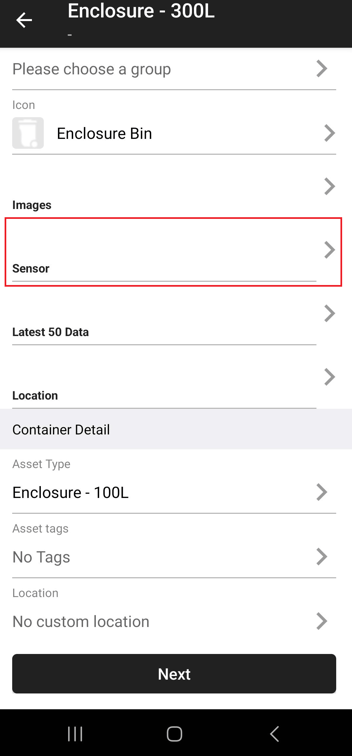
- Click on Sensor and click on the 3 dots located beside the Sensor ID Number to detach any previous sensor allocated to the asset.

- Click Okay on the below pop-up message.

Before allocating a new sensor to an asset, it is important to Detach any previously allocated sensor. This is because an asset cannot have more than one sensor allocated to it at a time.
If there is no sensor allocated to the asset before, you can proceed with the below following steps.
- To add a new Sensor, click the + icon

- Click on Sensor Name to allocate a new Sensor to the asset.
- Click on Select from List to allocate the new sensor.

If you are unable to find the sensor in the list of available sensors, it is possible that the sensor has not been allocated to your account before installation. In this case, please reach out to your Account Manager, Customer Success Manager, or contact support@superfy.com for assistance.
- Search for the Sensor ID Number using the Search Bar.
- Click on the Sensor ID Number to allocate it to the asset and click on Done.

- Enter the the Fill Height and Fill Gap measurements.

Learn how to take the Fill Height and Fill Gap Measurements.
- Click on Allocate to allocate the sensor to the asset.

If the sensor is turned ON, the asset icon will change colour from Grey to one of the options below.

Before leaving site, it is crucial to:
Take a Manual Reading to ensure that the sensor is active and transmitting data to the platform. Confirm that the date and timestamp are accurate, and compare the asset's fill level with the actual contents of the bin. This step is important to ensure accurate monitoring and management of the asset. Learn More